The Advertising Process.
This article describes how the advertising process works. After carefully reading through this page, you should have a good idea on how advertising takes place in the app and how to effectively promote your product and services to users in the app. The process is pretty straight forward and easy, once you understand everything.(App can be found here.)
Introduction.
Advertising in the AdCafé app is one of the simplest and most convenient ways to advertise. The app offers many benefits such as: reachability, targeting, affordability, reimbursability and progress monitoring, which help you effectively promote your product or service.
Advertising here occurs in 24-hour cycles. This means that when you upload an advert to the app, the advert will be showcased on the following day only for 24-hours starting at midnight. During this period, the app will show your advert to your targeted users.
This article is divided into 3: Uploading your advert, pricing details, Monitoring your Advert and Reimbursing your Advert.
Uploading your Advert.
To advertise here, you will first be required to upload your advert. First you will need to navigate to the Dashboard. Once there scroll down until you see a card marked "Share your product with the world! Advertise". Click on it.
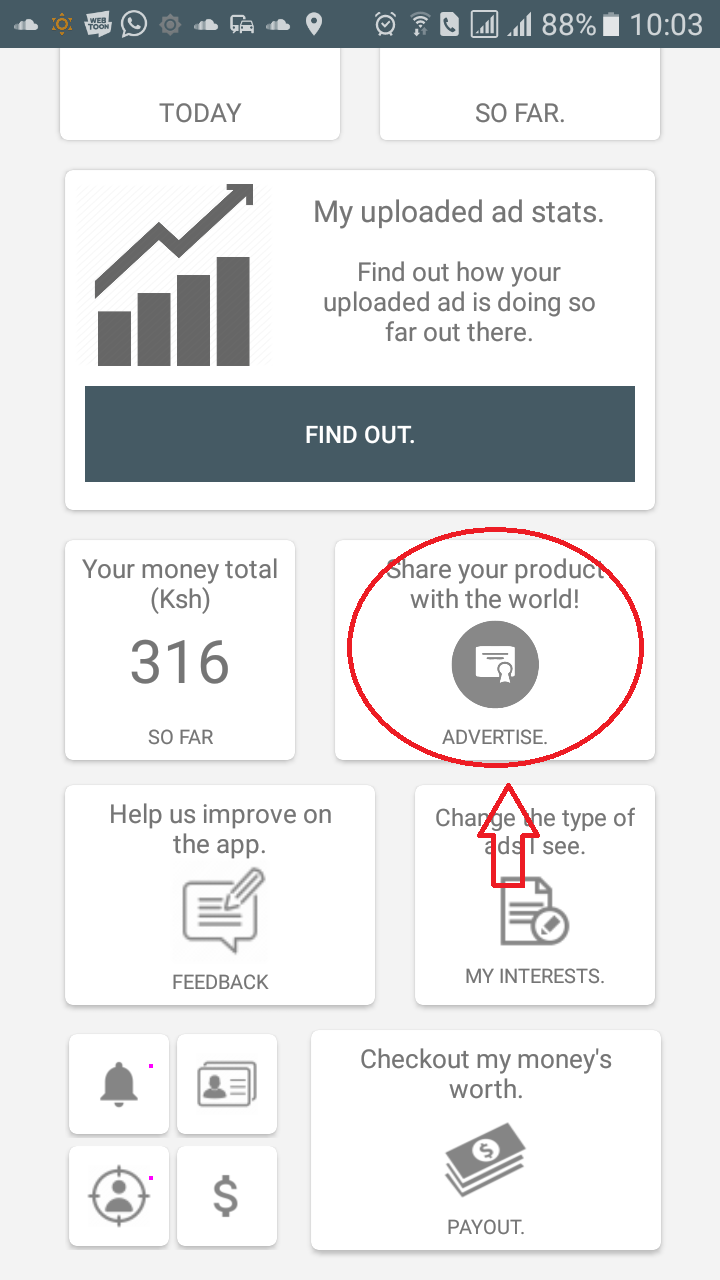
Once you do so you should be navigated to a page looking like this:
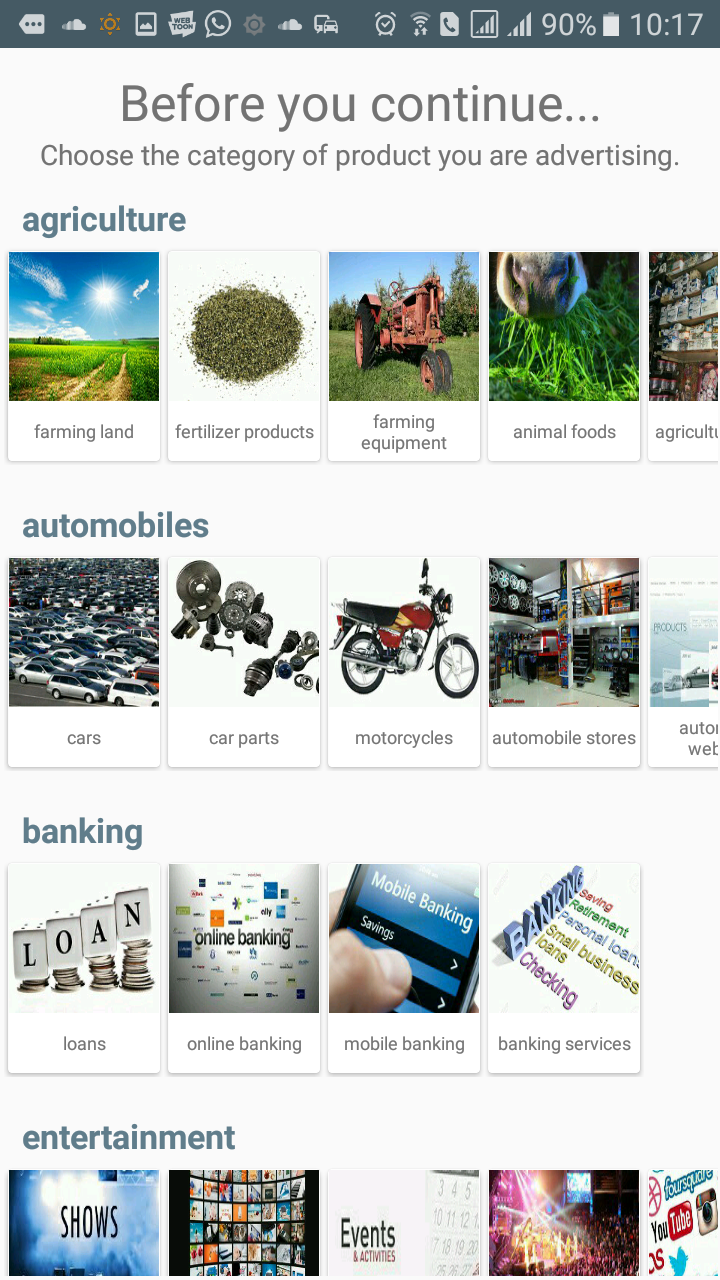
Here you will be required to select the category your product or service falls under. Each group of similar categories falls under a general category set, eg. farming land, fertilizer products, farming equipment, animal foods, agriculture stores etc. all fall under agriculture.
You can scroll down to browse through the category sets, and scroll left-right to scroll though the categories in each set. So if you wish to advertise your restaurant, for instance, you would pick 'restaurants' under food.
Once you find your suitable category, click on it. You should see a pop up dialog that looks like this:
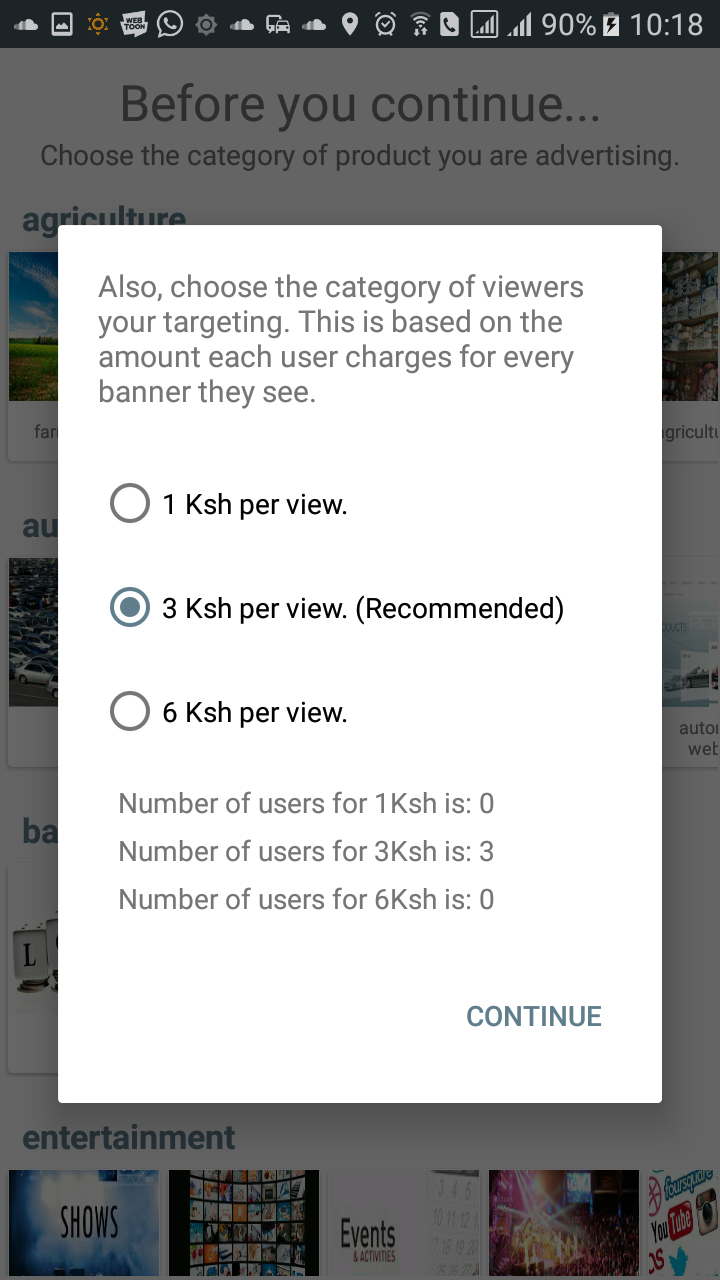
Here you will be required to select the category of users you are targeting. The app gives users freedom to choose the amount they charge for each advert they see. It then group the users who charge similar amounts together for advertisers to select.
We recommend users to charge 3Ksh, and we recommend you to target users who charge 3Ksh since it is a fair price for you and the users. The amount you choose will determine the amount you will pay to advertise.
Below the checkboxes, there are texts that indicate the number of users who charge the various amounts; like in this case, 3 users (who have subscribed to restaurants) charge 3Ksh.
Note that the values shown may change from time to time since the app gives users freedom to change the amount they charge and also the categories they've subscribed to.
Finally, click continue once you've selected your preferred user category.
You should be redirected to a page looking like this:
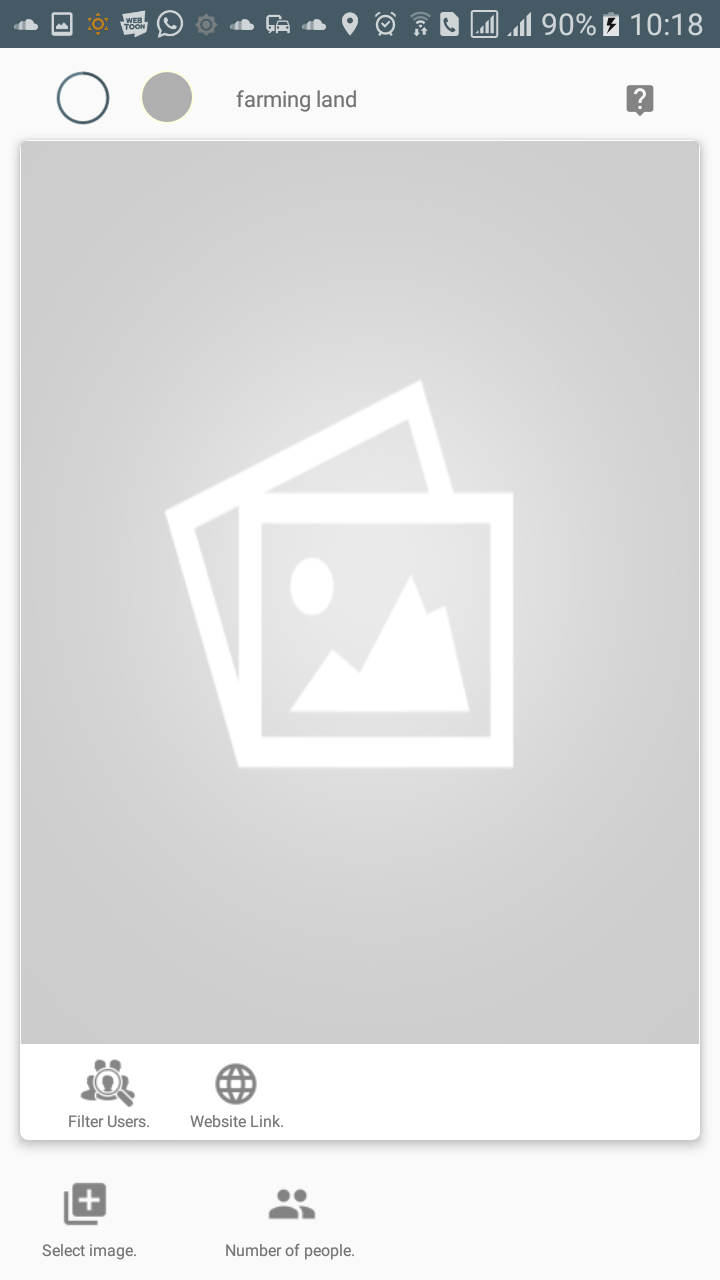
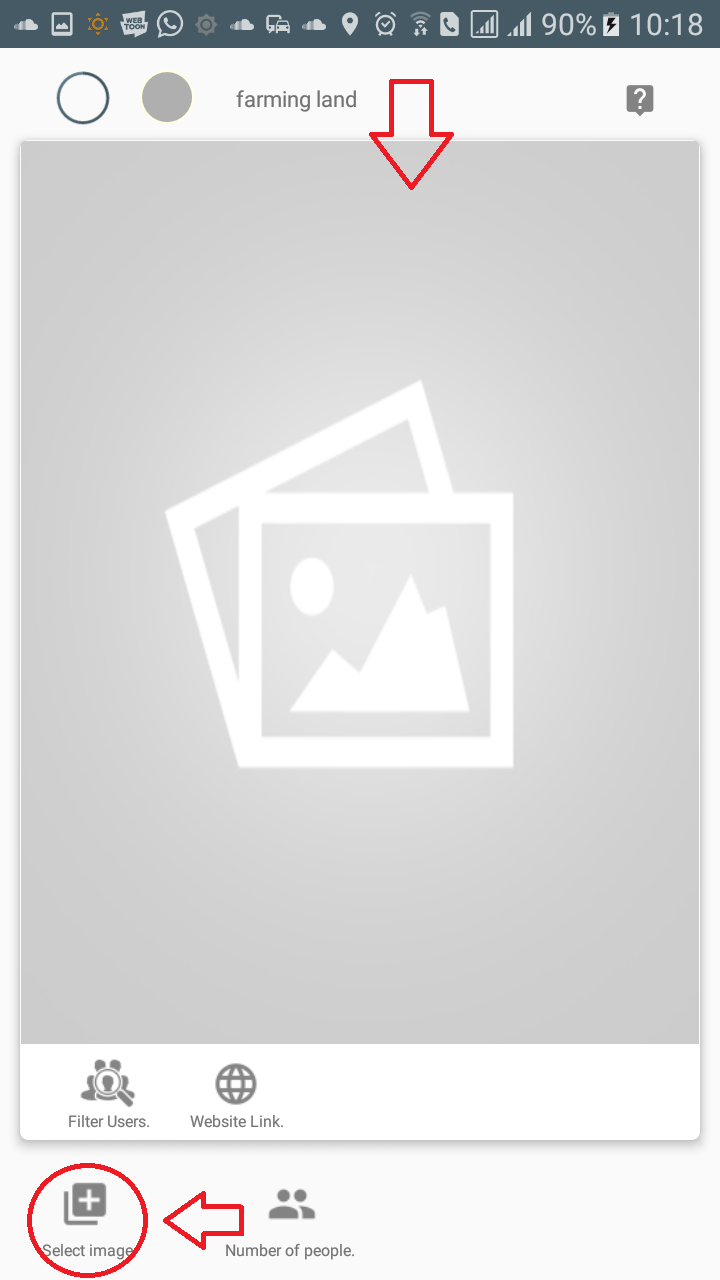
Once here, you will first need to select your advert's banner image. When selecting the image, be sure to use one that fits the aspect ratio required(4:3 aspect ratio) so as to bring out the best quality of the banner. Also make sure to use a good quality image with an adequate resolution(preferrably about 800 by 1200).
To select an image, click on the button marked 'Select image' or on the place-holder image in the card.
You should be redirected to your gallery folder where your images are stored like so:
When you select an image, the image will be set in the card. This will give you an idea of how your advert will look once it is being showcased to users.
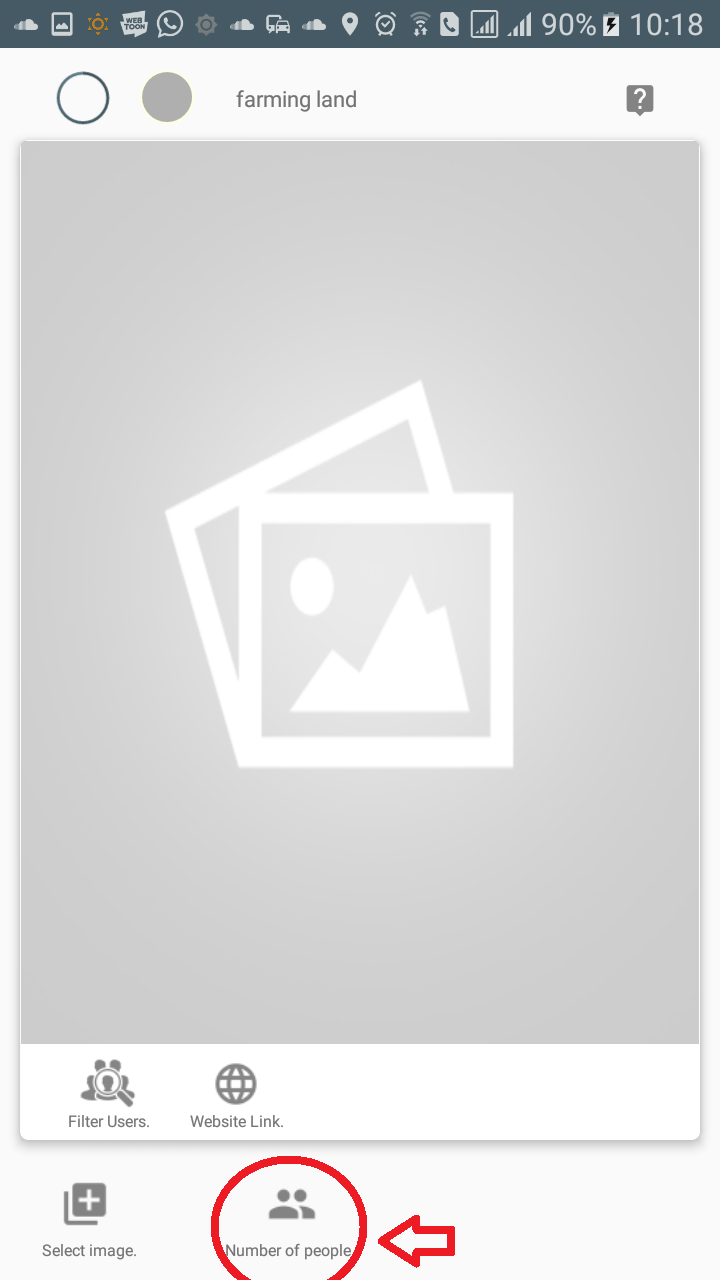
Next you will need to select the number of users you wish to target. The app allows you to pick a certain number(in 100 user denominations) of users you want to see your ad. This is to allow you(and other advertisers) to be able to target users based on your financial ability. So, small businesses and start-ups can afford to advertise to a small audience while larger corporations and international businesses can reach a large audience since they typically have a larger marketing budget.
To do so, click on the button marked 'Number of People' to set the number of users:
After doing so, you should see a prompt dialog box with a scroll wheel. The scroll well is used to select the number of users:
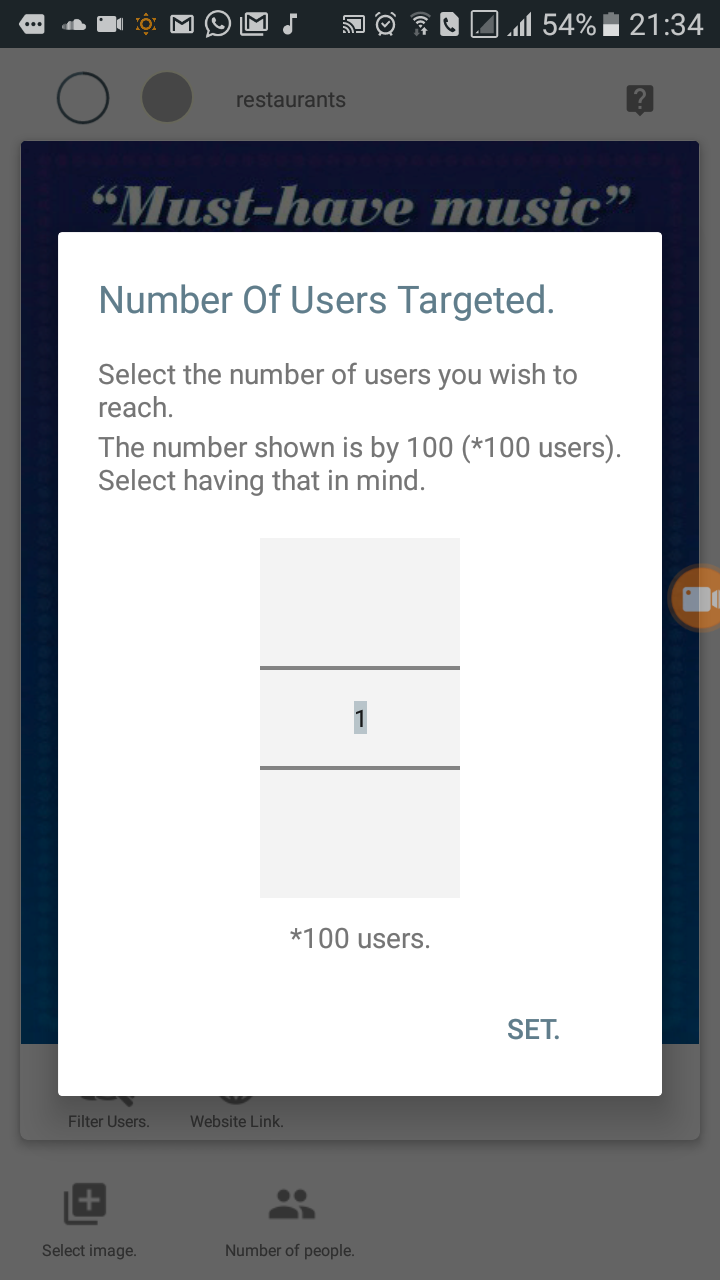
The numbers shown on the scroll wheel are by 100(*100 users), eg. in the example image, its 1*100 which is 100 users. Note that the app has a set minimum of 100 targeted users and you cannot set a number less than that.
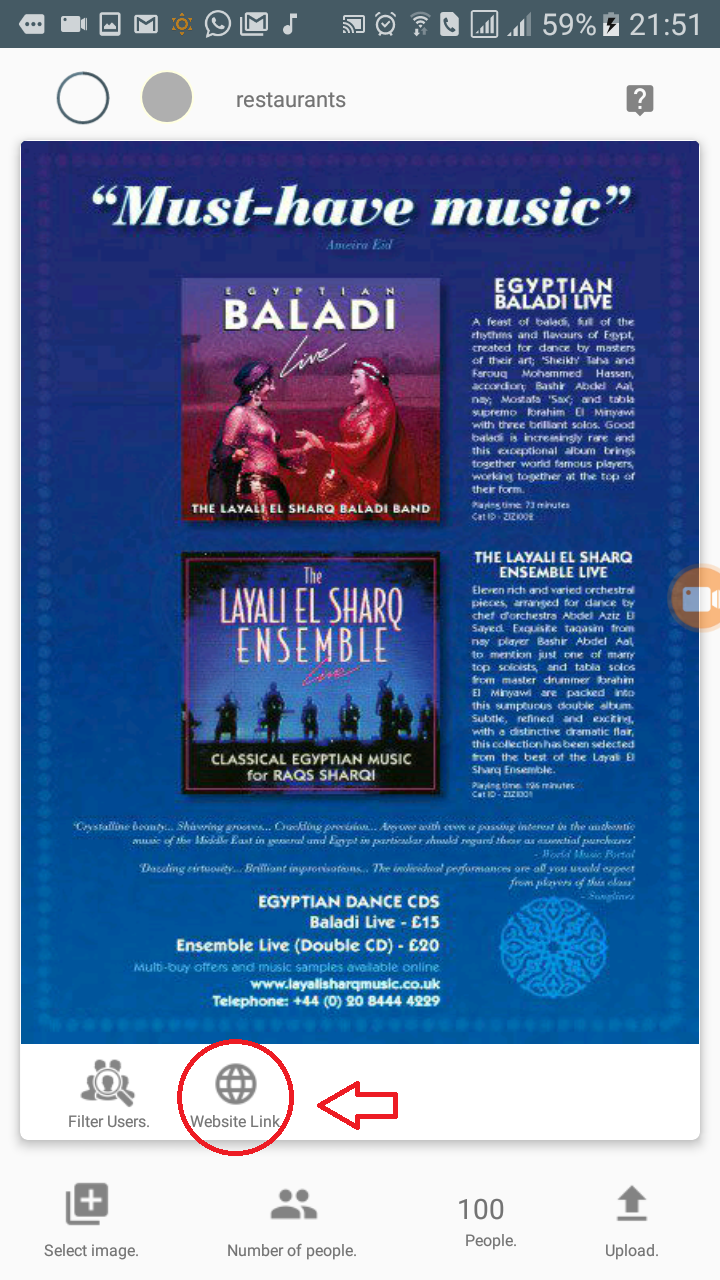
Once set, the number of users chosen will be shown next to the button and a upload button will be visible.
Once set, you can upload your ad. But before you do so, there are a few other options you can set. First is a website link. If you are advertinsing a service or product, you can add your website for users to be able to visit.
Next, filtering users. The app allows you to perform further targeting based on criteria such as age, sex/gender, user locations, device category and other categories. By doing this, you are essentially filtering your audience based on the selected preferences. Therefore, if a given user does not meet your set criteria, they will not engage your ad. As you set your preferences, the app will show you how many users you will reach.
Remember, while selecting the age group, the two scroll wheels represent the starting and ending ages. So in the example, users from 23 to 26 years will see the ad.
Also, while selecting locations in the maps, users within a 1000 meter radius(1Km radius) will engage the ad. The radius is represented by the light pale green circle around the marker. To add a marker, simply click on the map. To remove a marker, simply click on the marker. To move a marker, simply press and hold on a marker until it is unpined from the map then move it to the prefered location. Also, the map shows various user locations represented by small green dots.
Also, when opting for multiple category advertising, the categories you choose will be the categories the app uses to filter the targeted users. So when you choose one or more categories, the app will only show users who are interested in them; for example, if I'm targeting users interested in cars, and opt to add car parts and car websites, the app will ony show users interested in cars, car parts and car websites only.
Also, while setting your website, you have an option of adding an incentive to motivate users to visit your website.
Note that the amount you set is up to you and is for each user you target, and will be included in the final amount you pay. Also, the incentive you set is not only for loading your website, but also for scrolling through it as well.
When a user clicks the contact advertiser button during the showcasing of you ad, the incentive you set will be shown like so:
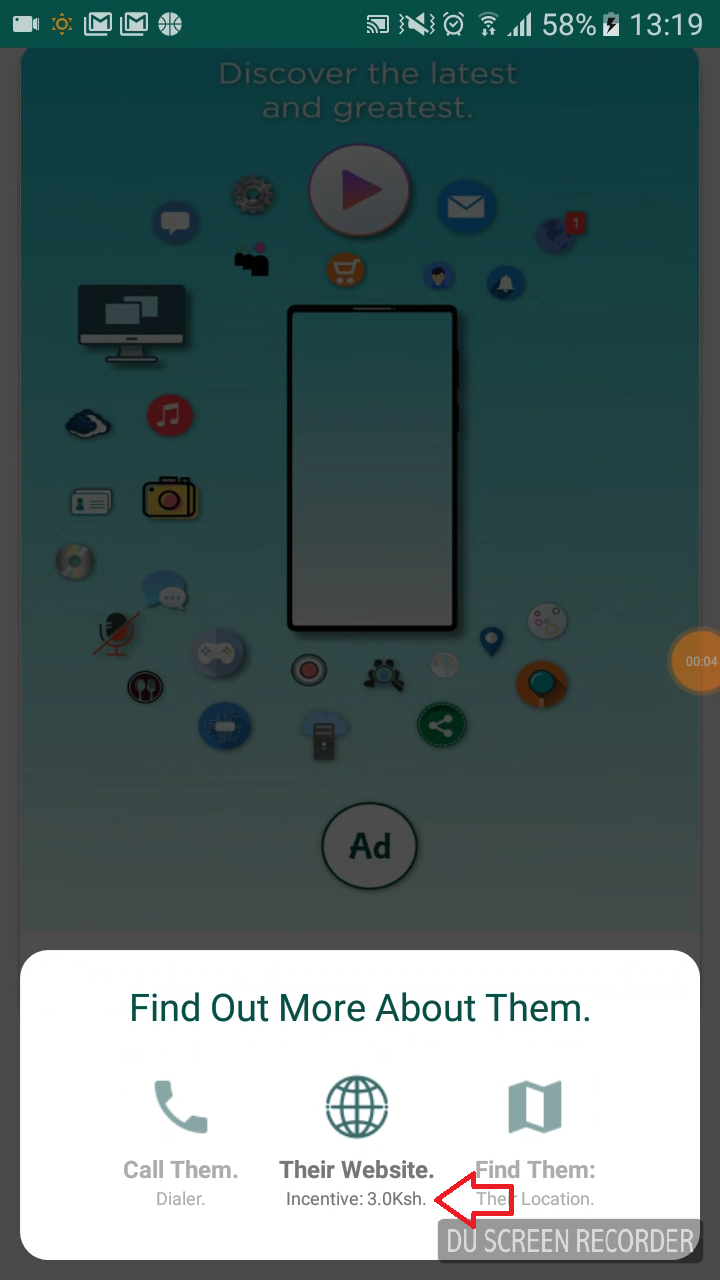
When the user clicks on it, they will be directed to your website like so:
There is a progress icon at the top that increases when the user scrolls though your website. Then when the progress icon is completed, the user receives the incentive you offered.
The progressbar will not increase if the user flings(scrolls really fast without looking at the content) or scrolls really slowly. The app actively checks that the user is actually browsing through your content at the right pace.
Finally, you may upload your ad. To do so, click on the button labelled 'Upload'. As of now, we only support MPesa payments.
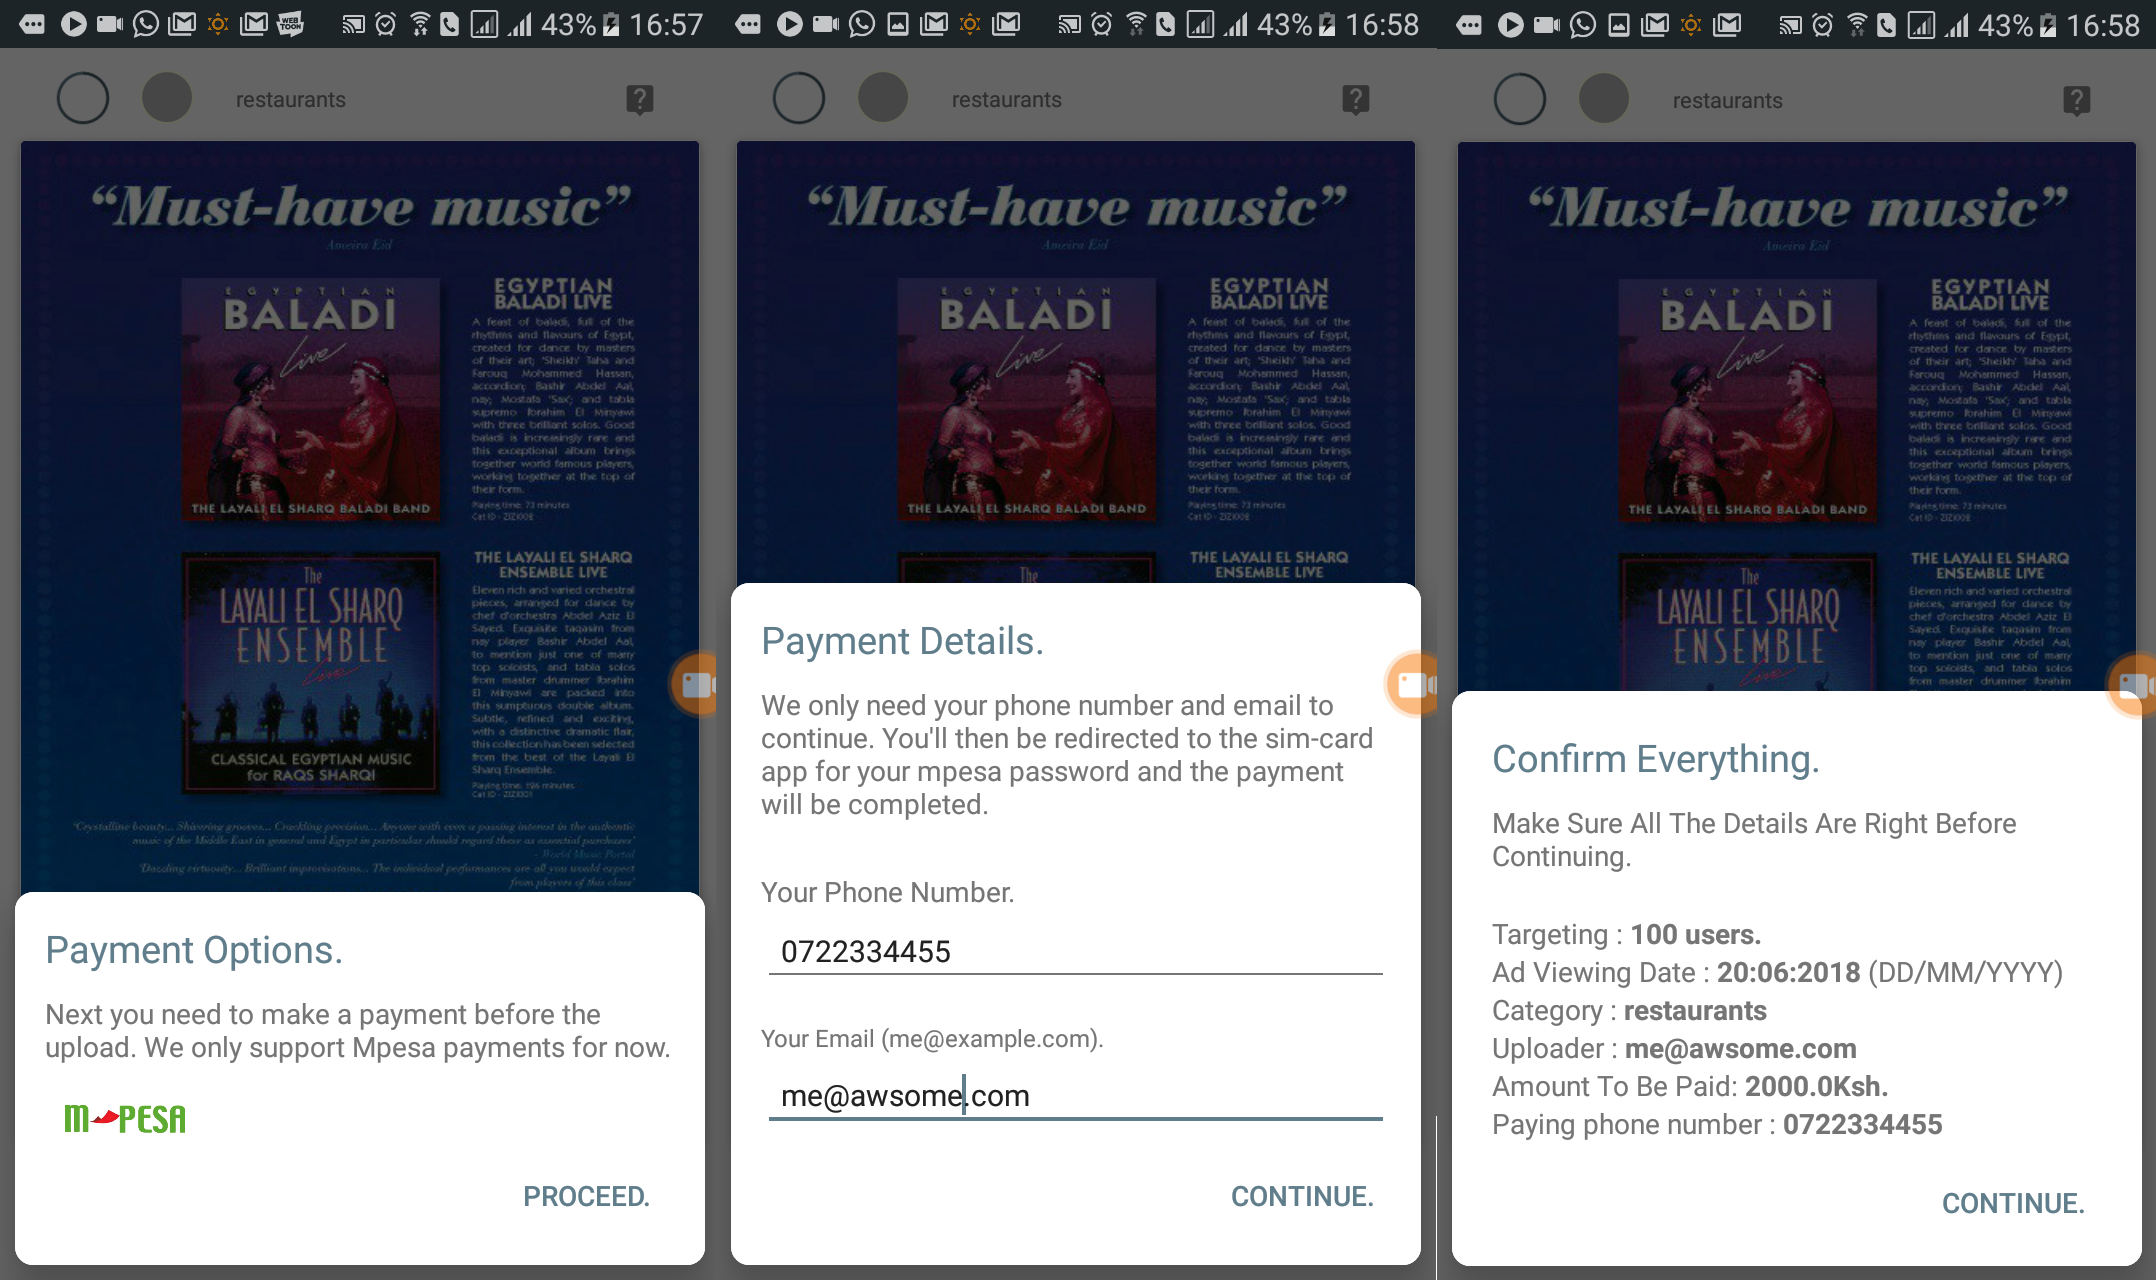
You will receive a bottom prompt requesting for your phone number and email. Then after confiming all the details, a prompt will appear like so:
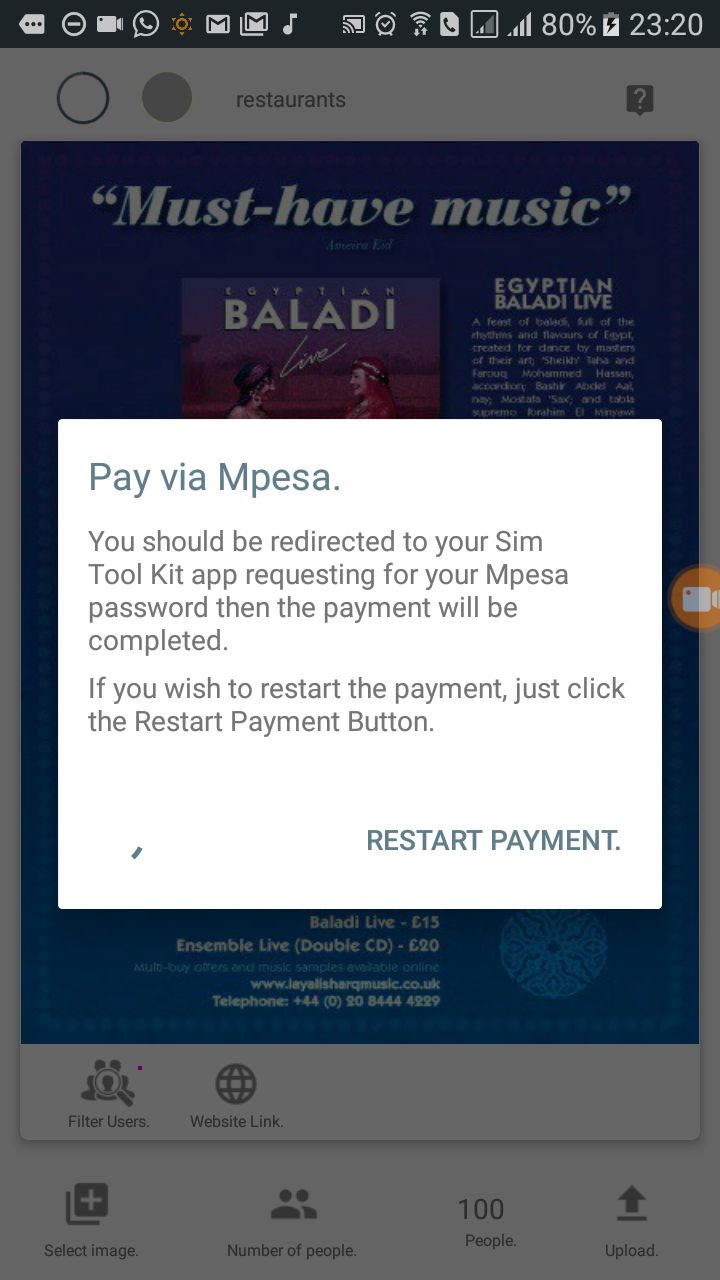
You should be redirected to your sim tool-kit app requesting for your Mpesa password. Once you put the password, the payment will be completed. The app will automatically detect the payments once complete and will proceed to upload your advert.
Pricing Details.
For the purpose of simplicity, pricing details will be described for every one user targeted.
Users in the app charge for their time: 1Ksh, 3Ksh and 6Ksh. Therefore, the cost of advertising here depends on the amount charged by each user targeted. We charge 2Ksh on top of the amount charged by the user targeted. So for instance, if a user charges 3Ksh the total price would be 5Ksh.
For user payouts, Mpesa charges 15ksh(between 0.01Ksh and 99.99Ksh) to make a transfer to the users Mpesa acount for every payout they make. Unfortunately, this is a cost you may have to incur as well. So if a user charges 3ksh, you may have to pay 20Ksh(3Ksh + 2Ksh + 15Ksh). However, the payout cost is not a cost you may incur alone.
Different advertisers may target the same user in a given day and as a result, the user may engage in multiple advetisements before making a payout. Therefore, the cost for making the payout will be divided among the advertisers who targeted the user and the total remaining amount paid will be divided amongst the advertisers and will be added to their reimbursements.
For instance, if a user(charging 3Ksh) sees 4 adverts in a given day between making payouts, they will only need 15Ksh to make payouts. But since each of the 4 advertisers paid 15Ksh, a total of 60Ksh, 45Ksh is not needed. Therefore, the app will divide the 45Ksh between the 4 advertisers and add to their reimbursement totals. So in reality, the advertisers only pays 3.75Ksh for the users payout instead of 15Ksh. We refer to this as cost splitting and it occurrs for all our users.
Please note that these costs are VAT exclusive.
Monitoring your Advert.
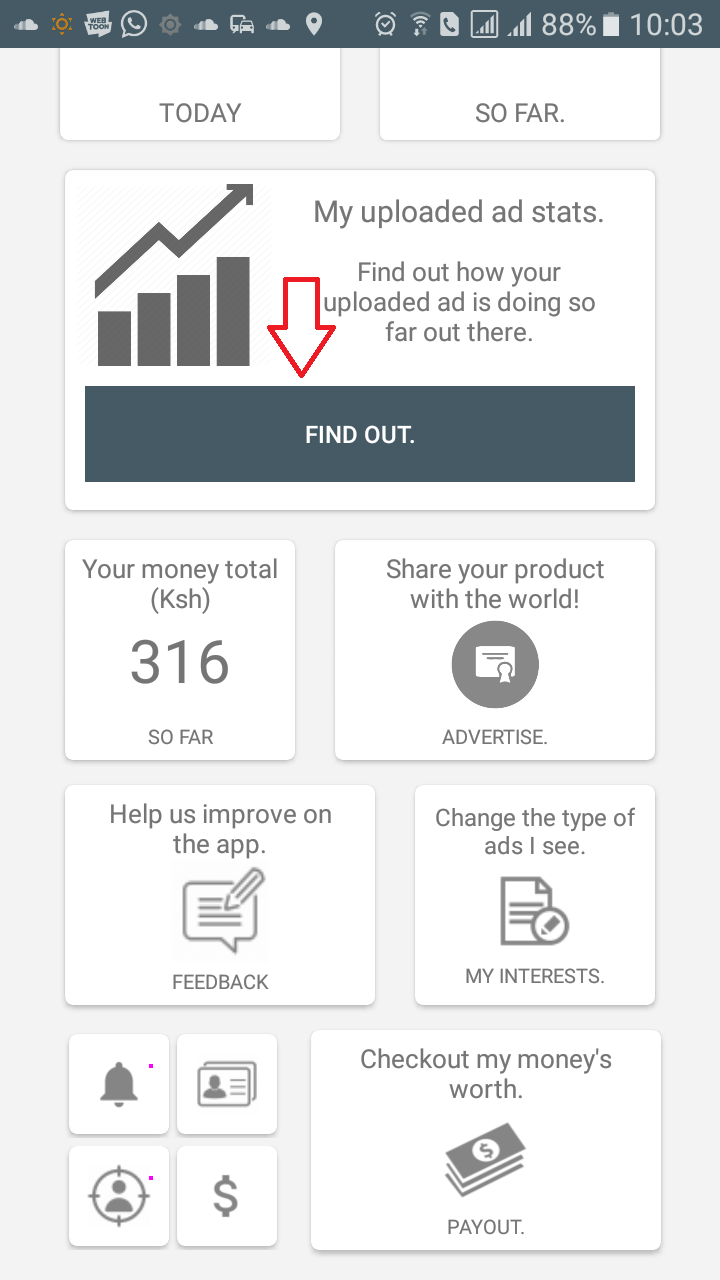
Once you upload your ad, you should be redirected back to the dashboard. To monitor your uploaded advert, you will need to move into the Ad Stats page by clicking the green button marked 'find out':
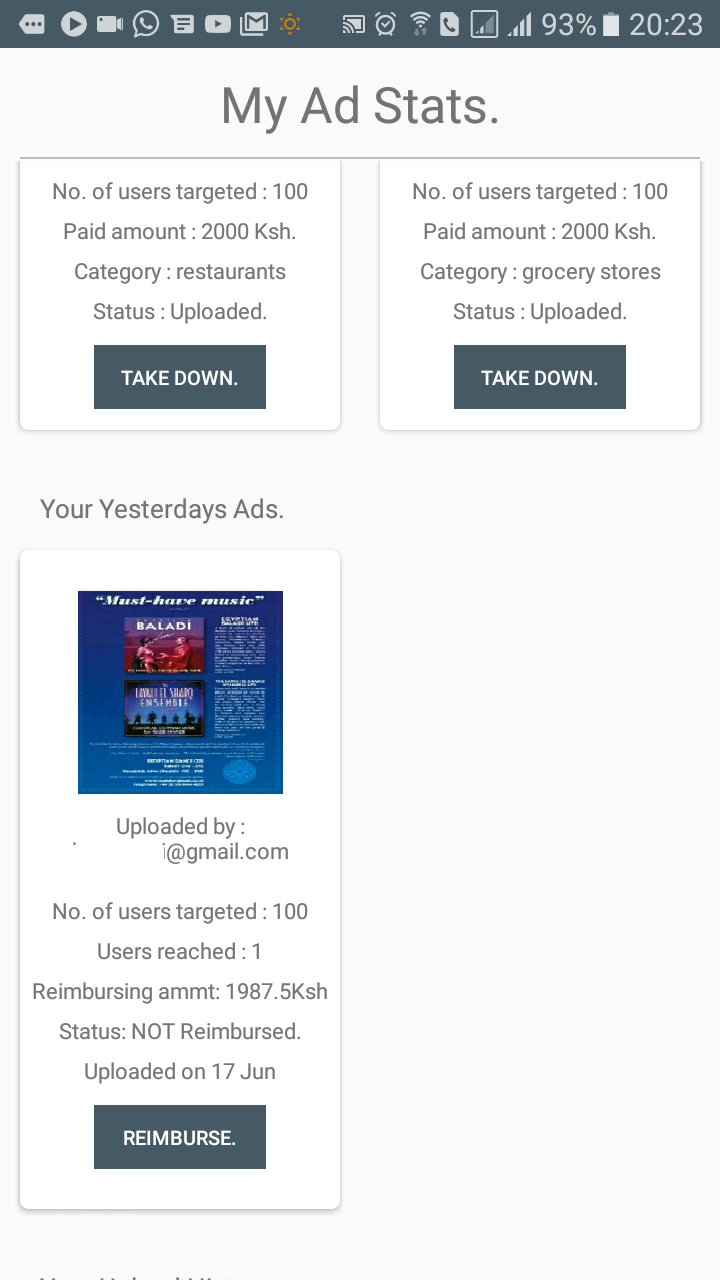
Once you do that, you will be redirected to the page where you should see your advert.
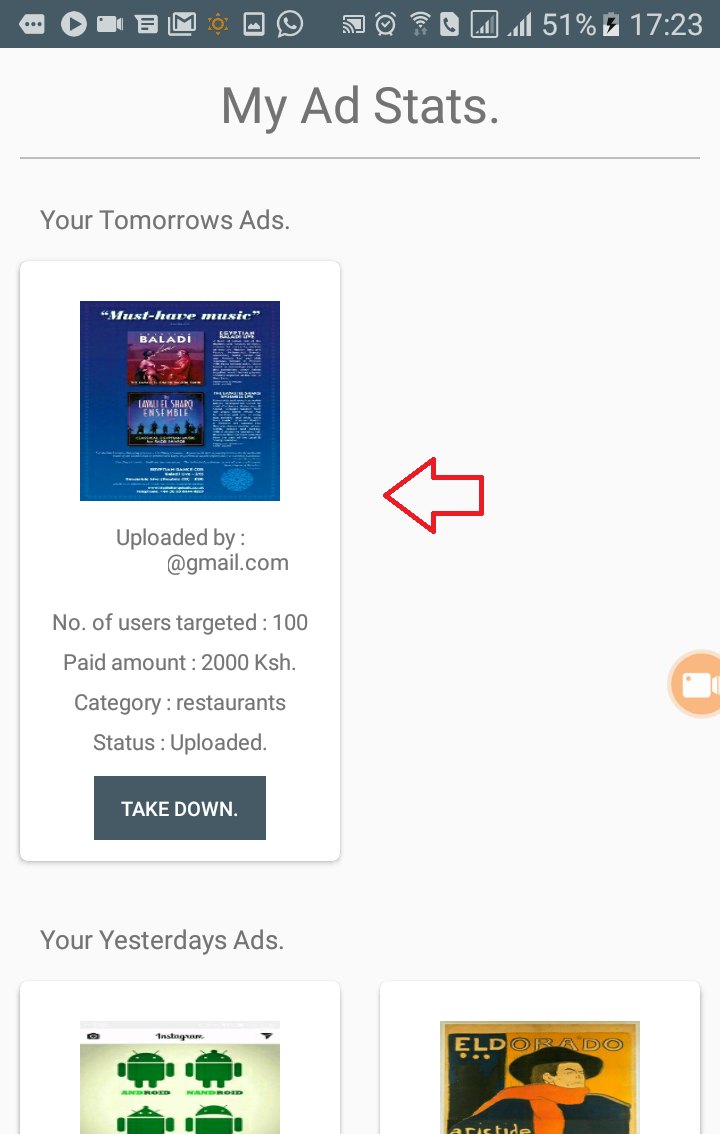
Your uploaded advert will be in a card showing the details such as the paid amount, number of users targeted, your email, the advert category, and its status. Below the advert status, there is a button marked 'take down' which allows you to take down the ad if you need to do so.
When you do so, the button will change to 'put up', so if you wish to put back up your ad, you can simply reverse. Do note that you can only take down the ad on the day before showcasing. Also, when you take down your ad, you will be able to reimburse yourself the paid amount, on the day after it was set to showcase.
On the day of showcasing the ad, your ad will be in a similar card in the Ad Stats page like this:
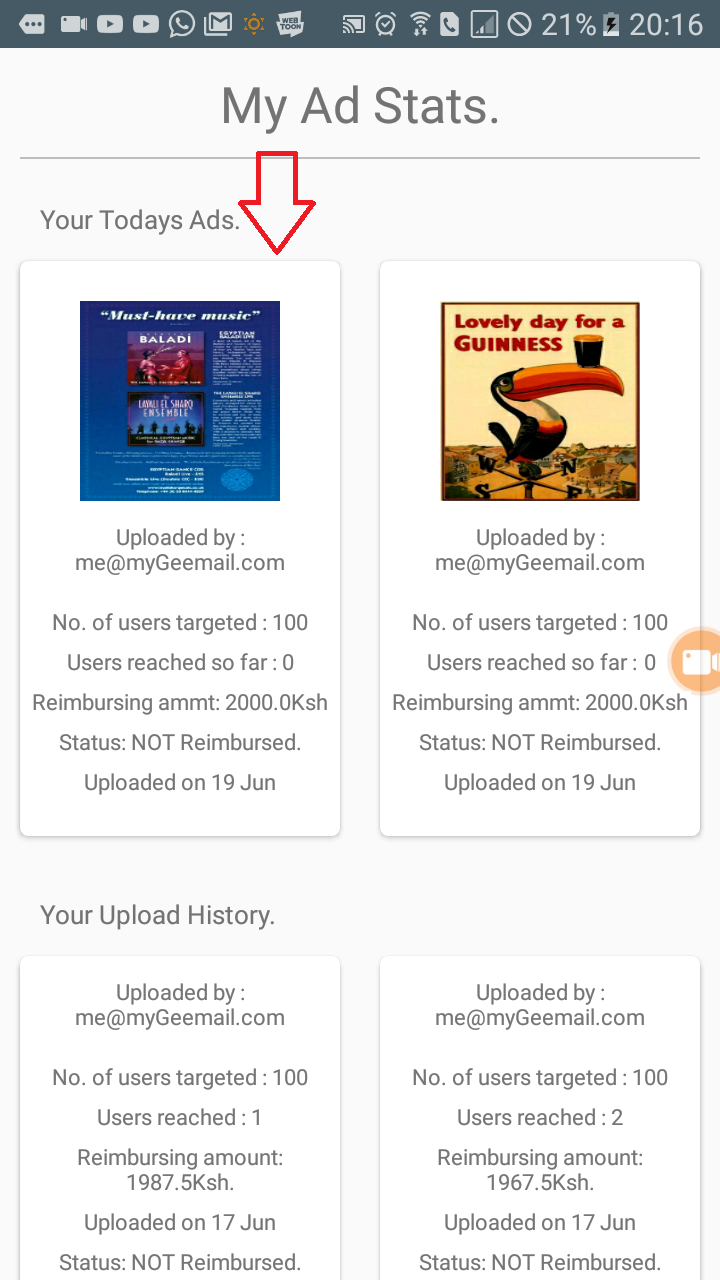
Here there are a few new statistics you will see: users reached so far, Reimbursing amount and the ad's status. The users reached stat indicates the number of users who have seen your ad so far. Reimbursing amount represents the amount to be paid back to you so far and status shows if you've already made a reimbursement. Reimbursements are done on the day after showcasing your advert.
Meanwhile, the app will be loading your advert to your targeted users. So they will be seeing it in a presented form like this:

When the your ad is loaded, the top timer will start counting down. The app advertises by 7(seven) second views. During this period, the user will see your ad or will be engaging in your content. The timer will only count down when the advert is in focus, meaning, any action(eg. opening a dialog-box, moving your advert card out of focus, moving out of the page, moving to another app or even swiping down on the notification bar) will pause the timer until your advert comes back into focus.
Once the timer hits 0(Zero), the app will update the number of users who have seen your ad and the current reimbursal amount. The app updates your adverts stats in real time, meaning, it will update the number of users who have seen your ad as they see it and update your reimbursal amounts. This will happen if your monitoring your advert in the Ad Stats.
This will occur when each user you targeted sees your advert. Also when a user sees your ad, the reimbursal amount will be deducted. When a user sees an ad, the total amount you paid for that user eg. 20Ksh(i.e: 3Ksh+2Ksh+15Ksh) will be reduced from your ad's reimbursement amount. But as the user proceeds to view another advert from another advertiser, the unneeded amount from the app's cost-splitting(refer here for the explanation of this) will be added to your reimbursal totals.
Like in the video example above, the app deducted 20Ksh from the first ad when I saw it. Then when I saw the second one, it deducted 20Ksh from the second one then added 7.50(i.e 30Ksh total paid amount minus 15Ksh payout amount divided by 2 advertisers) to both adverts, giving them both a total of 1987.5Ksh.
Reimbursing your Advert.
Once the showcasing day is done, the app will confirm your ad's number of views and re-calculate the reimbursal amount. You should be able to see this in the Ad Stats page.
The details showed about your advert should be farmiliar: Users reached, reimbursing amount, and status. Users reached shows the number of users that saw your advert during the showcasing day, reimbursing amount is the amount to be paid back to you and status shows if you have already made the reimbursement.
If there is an amount for reimbursing the button will be clickable. To make the reimbursement, click on it. It should open a bottom prompt requesting for your phone number and your login password(similar to making user payouts). This is to prevent unauthorised payouts, so make sure to keep your password private and secure. Then after confiming your details, the payout will be completed.
When the payout is made, the reimbursing amount will be set to 0(Zero) and the status will be set to 'Reimbursed'. At this point, the advertising process will be completed.
Do note that, you dont need to make the payout on the day after showcasing the advert. The advert will be available for reimbursement on the any day after showcasing under 'Upload History' in the Ad Stats, and will look something like this:

Tips and final thoughts.
The AdCafé gives you the ability to advertise to a variety of its users and promote your product effectively. The app allows for seamless, simple and effective advertising in a process that beneficial to both users and advertisers.
Tip: The categories set in the app do not necessarily limit you based on the product you are advertising. They can serve as context between you and the user. For instance, if you deal in property insurance, you can target users interested in interior design by designing your advertisement in a way that would make it appealing to them.
Be sure to regularly check the progress of your advertisement through the Ad Stats.
In the event that you deal with a particular product or service thats not represented in any of the categories, be sure to contact us so that we can help out. The app was designed to be flexible and easy to add new categories for new and emerging markets.
Contact Us.
If you have any questions or suggestions about the app, its features and capabilities, do not hesitate to contact us:Email: adcafeteam@yahoo.com
©Copyright 2018, Color Technologies.